This is an article from the WPF software development series of Binary Studio IT geeks. It explains how to deploy and publish yours WPF application through ClickOnce technology. Also it helps to create auto-self updater.
Deploy and Update WPF application with ClickOnce technology.
In this article I’d like to tell you about ClickOnce technology which helps to realize easy deploy, installation and update of the windows based client application such as WinForms and WPF. Application can be distributed to install and to receive updates in the forms of URL, URI and CD. In .NET 3.5 PS1 new possibilities were added, so now you can use not only IE for publishing your app in web. If you don't want to bother with all this, you can ask us to do a stunning applicaton for you - we provide professional .net software development services. If you just want some help and want to do all by yourself - here we go! So ClickOnce is a Microsoft technology for deploying Windows Forms or Windows Presentation Foundation-based software, also called Smart clients. It is similar to Java Web Start for the Java Platform. ClickOnce is only available in .NET 2.0 and later. A less advanced technique can be obtained with the Microsoft Updater Application Block. Let’s start! I created very simple WPF application which looks like: 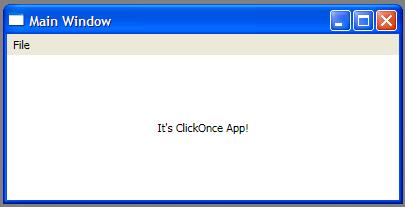 Now we have the application, we are ready to deploy it. We need to select the property of the StartUp Project and choose Publish tab.
  Here we see user-friendly and clear interface. I use “C:\Publish” folder for deploying application in local folder in my computer (if you use server it will be “\YourServer\YourApp \YourPublishDirectory”). When we click to “Application Files” button we’ll see all files which will be included in deploy.
  Note: you can add any files to your assembly. For this you have to include this file to StartUp project, and then you need to change “Copy to Output Directory” to “Copy if newer” and “Build Action” to “Content”. I can’t find any way to add file from dependency assembly (if you find it -please tell me!). In “Prerequisites” button you can define products which should be included into your product. During installing your ClickOnce application check to see if those products are not installed and install them if needed. For me most interesting button is “Updates” where you can add self-auto update to your application.
 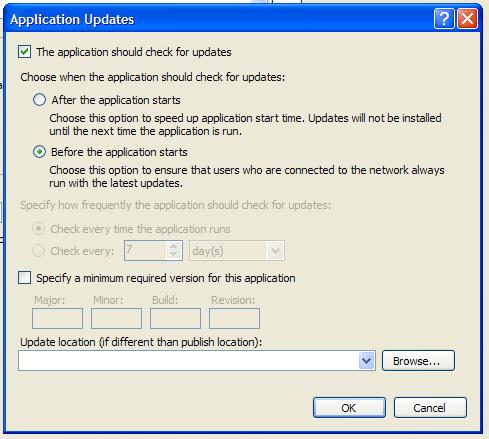 You can specify when app should check for updates, maybe time range for it. And of course please remember to include path for updates if it’s different. So I added update for this project. Then clicking “Options” button you can specify many different options such as publisher name, product name, support url and etc. Also interesting is “Deployment” tab:
  You can specify deployment web page for testing your application. And I suggest to choose “Use “*.deploy” file extension”. If your hosting deny any *.exe or *.msi files it’ll solve it. Also you can specify file extensions in your application. And in “Manifest” tab you’ll see:
  You can block your app from being activated from uri, allow parameters in uri, create desktop shortcut. If you add security certificate to your app, it’ll add information about your company. BTW: you’ll see it during installation instead of normal installator. And I selected “Exclude deployment provider URL” because I don’t know which server my app will be deployed in. So now we are ready to click “Publish Wizard” and few times next (or “Publish Now” and speci-fy installation folder Url too). After this I got following in my publish folder:
  You are ready to distribute your application! Let’s install it.
 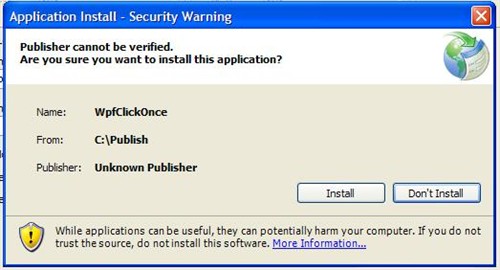 Of course you’ll see your app in Start Menu and desktop shortcut. Let’s make small update. I only changed a background in my main window to “Aqua” and pub-lished it once more.
  We got new version (because we selected “automatically increment revision”). After publishing we have a new version in folder:
  Now I start my app from Start Menu and get:
 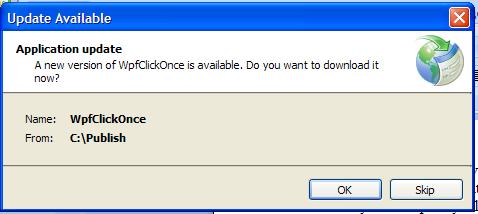 Yep, new version is available and I install it. And of course after this the label has background.
  If you deploy new version and you want to reinstall all copies of your app, you should specify a minimum revision version, like this:
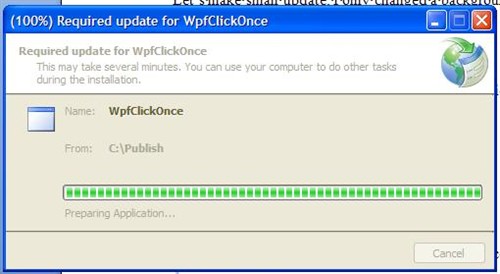
 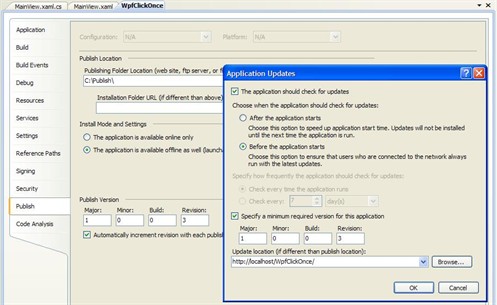 And now after starting my app all updates were installed without asking me!
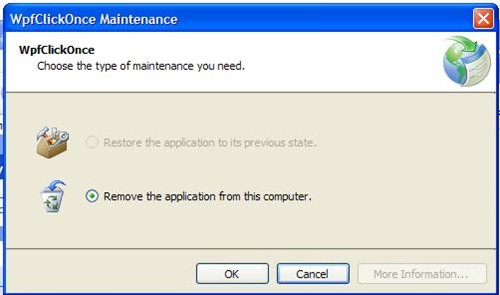
  And if you want to uninstall it, you can’t restore previous version, only uninstall is available!
  Now a few words about ClickOnce, you can work with this technology in run-time. For this you should use ApplicationDeployment class from System.Deployment assembly. There are a few helpful properties:
- IsNetworkDeployed – checks if your app was started with ClickOnce. If this property is false, you can’t use other properties!
- IsFirstRun – check if is it running the first time.
- ActivationUri – gets parameters.
- CurrentVersion – checks the current version of your app.
Then of course you can Check/Update and DownloadFileGroup new version (asynchonical version is available too). In this article we deployed and made self-auto update for our application by ClickOnce with MS Visual Studio 2008. BTW: you can make it without Visual Studio, using MS Build, Mage or MageUI utilities.
ClickOnce on Apache
Although it might seem as though you can only use Microsoft's ClickOnce installers with IIS, this is simply not true, as all you need to do is set some MIME types on the server. The simplest way to do this is to add the following lines to a .htaccess file in the folder contain-ing the ClickOnce files:
- AddType application/x-ms-application application
- AddType application/x-ms-manifest manifest
- AddType application/octet-stream deploy
Once you've done this, your ClickOnce applications should install correctly. You may also want to add the correct MIME types for XPS files, XAML files, XAML Browser Applications (XBAPs), and Silverlight applications. To add these, simply add the following lines:
- AddType application/vnd.ms-xpsdocument xps
- AddType application/xaml+xml xaml
- AddType application/x-ms-xbap xbap
- AddType application/x-silverlight-app xap
That’s all! I hope it was a useful article. Artyom G., .NET team, Binary Studio


